Red Velvet Cake Recipe: Easy, Moist Dessert in 30 Min
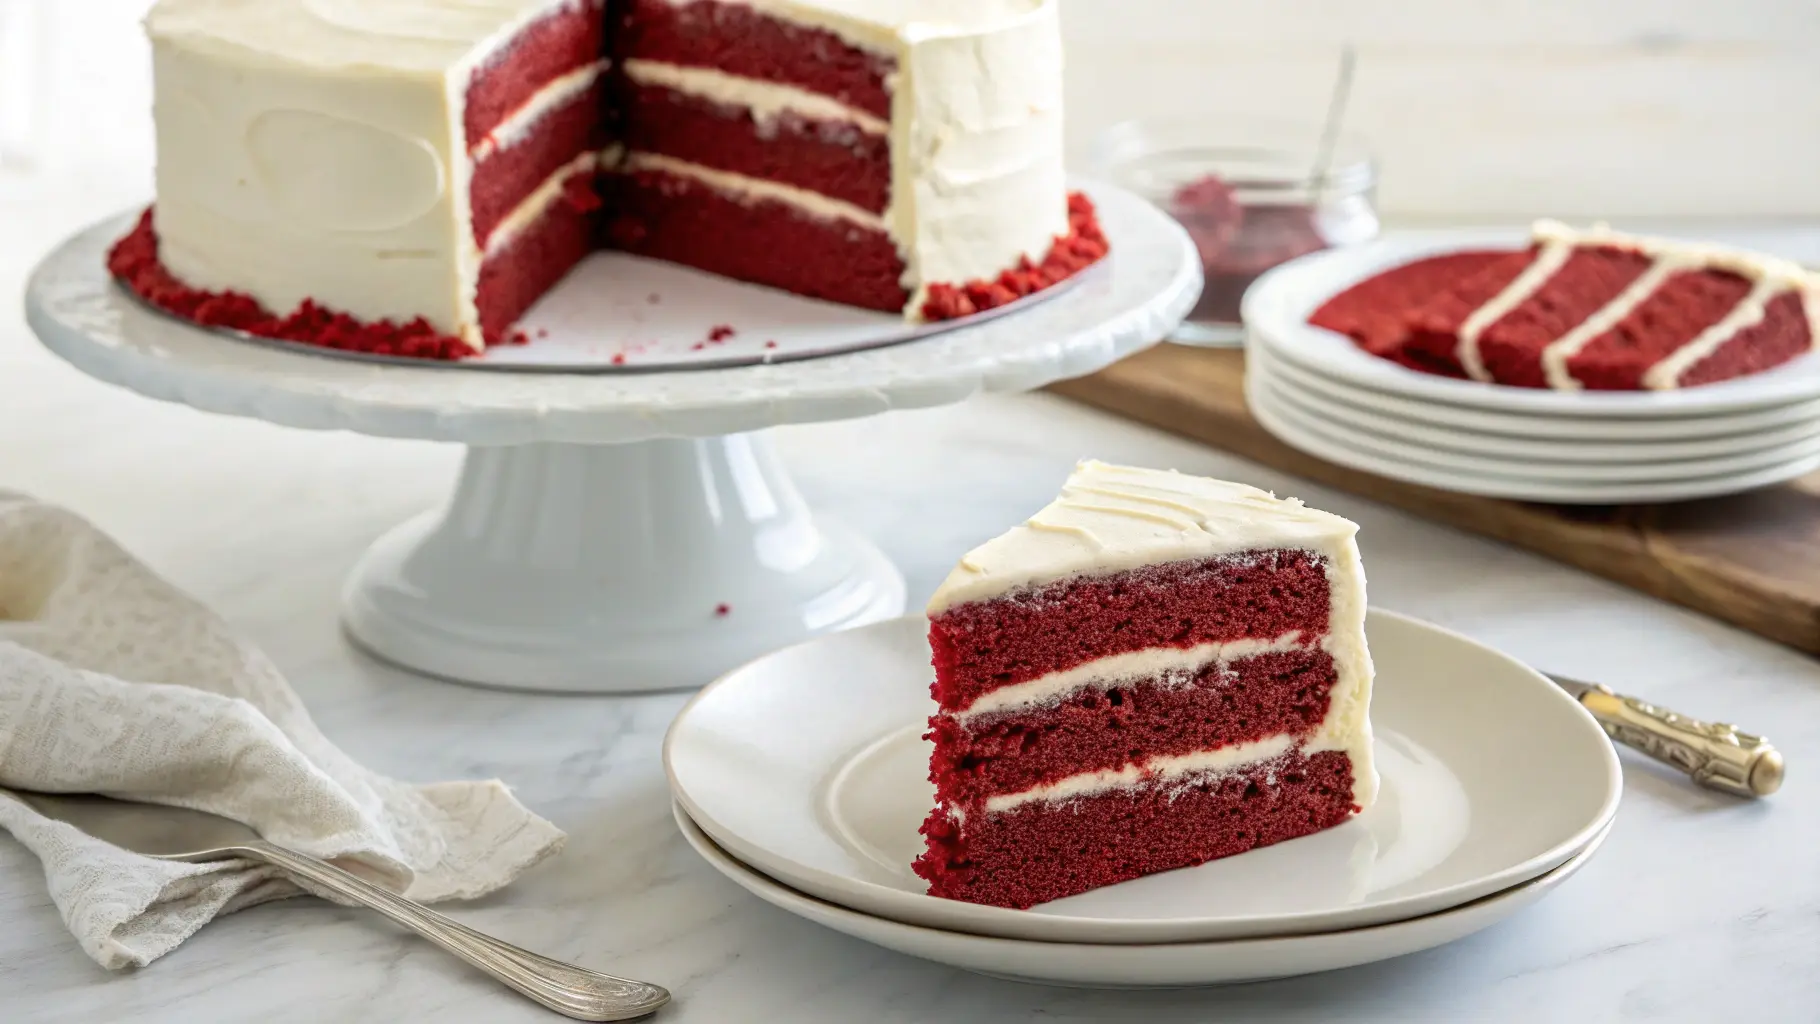
Red velvet cake, with its vibrant hue and velvety texture, is a beloved dessert for birthdays, holidays, or any special occasion. This red velvet cake recipe is easy to follow, even for beginners, and yields a moist, flavorful cake topped with creamy cheese frosting. In this guide, we’ll walk you through every step, share expert tips, and answer common questions to ensure your cake is a showstopper.
Table of Contents
What Makes Red Velvet Cake Special?
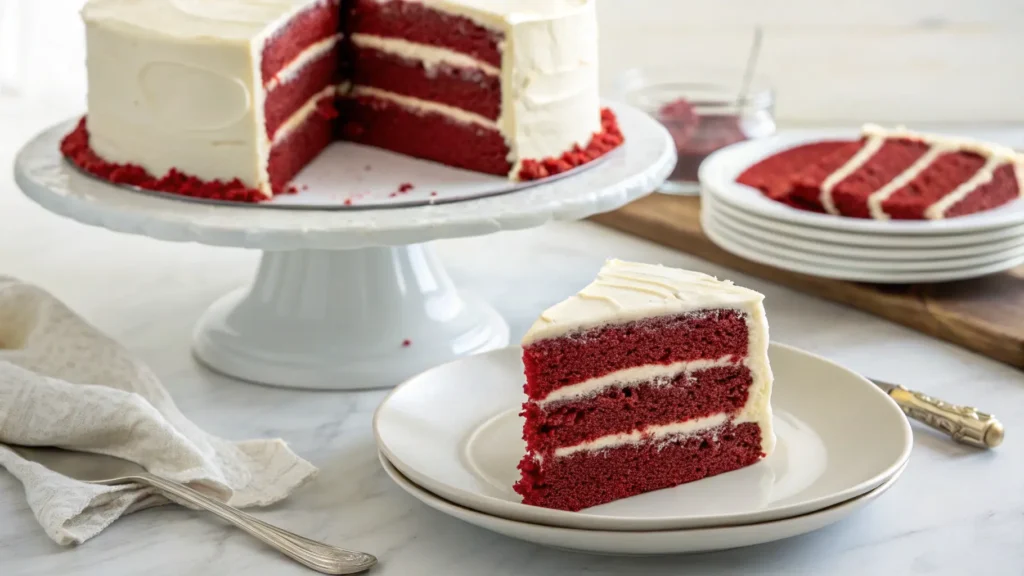
Red velvet cake stands out for its unique flavor—a blend of vanilla, cocoa, and a tangy note from buttermilk. Its striking red color, often achieved with red food coloring, makes it visually stunning. Many love its ideal mix of sweet and tangy flavors, complemented by creamy cheese frosting.
The cake’s history traces back to the early 20th century in the United States, particularly the South. According to Wikipedia, its popularity grew during the Great Depression when bakers used beet juice for color. Today, gel food coloring ensures a vibrant hue, but the classic taste remains timeless.
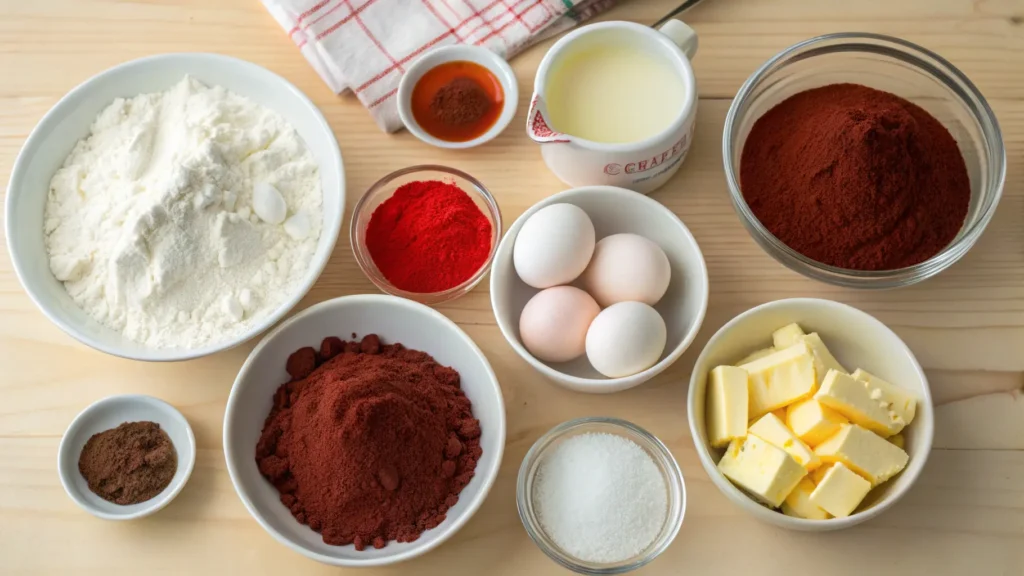
Ingredients for the Perfect Red Velvet Cake
Before you start, gather your ingredients. Using fresh, high-quality items ensures the best flavor and texture. These are the ingredients for a two-layer, 9-inch cake:
- Dry Ingredients:
- 2 ½ cups all-purpose flour
- 2 tablespoons unsweetened cocoa powder
- 1 teaspoon baking soda
- ½ teaspoon salt
- Wet Ingredients:
- 1 ½ cups granulated sugar
- ½ cup unsalted butter (room temperature)
- ½ cup vegetable oil
- 2 large eggs (room temperature)
- 1 cup buttermilk (room temperature)
- 2 tablespoons red gel food coloring
- 1 teaspoon vanilla extract
- 1 teaspoon white vinegar
- For Cream Cheese Frosting:
- 16 oz cream cheese (room temperature)
- ½ cup unsalted butter (room temperature)
- 4 cups powdered sugar
- 1 teaspoon vanilla extract
No buttermilk? Combine 1 cup of milk with 1 tablespoon of lemon juice or white vinegar and let it rest for 5 minutes.
Essential Equipment for Baking
Basic tools are enough, but using proper equipment simplifies the baking process. Here’s what you’ll need:
- Two 9-inch round cake pans
- Parchment paper (for lining pans)
- Stand mixer or electric mixer
- Mixing bowls
- Whisk and spatula
- Cooling rack
- Cake stand (for serving)
Line your cake pans with parchment paper to stop the cake from sticking. A stand mixer saves time, but a hand mixer works just as well for the cake batter and frosting.
Step-by-Step Red Velvet Cake Recipe
Follow these steps for a moist, delicious cake. Preheat your oven to 350°F (175°C) and grease your cake pans before starting.
Step 1: Prepare the Dry Ingredients
In a medium bowl, sift the flour, cocoa powder, baking soda, and salt to create a lump-free, smooth batter. Set this aside while you work on the wet ingredients.
Step 2: Mix the Wet Ingredients
In a large bowl, use a stand mixer to cream the butter and sugar until light and fluffy, about 2–3 minutes. Add the vegetable oil and mix well. Then, add the eggs one at a time, mixing thoroughly after each addition. This creates a stable base for your cake batter.
Step 3: Add Flavor and Color
Pour in the buttermilk, red gel food coloring, vanilla extract, and white vinegar. Mix until the batter is evenly colored. Gel food coloring gives a brighter hue than liquid, so you need less. If you prefer a natural option, beet powder can work, though the color may be less vibrant.
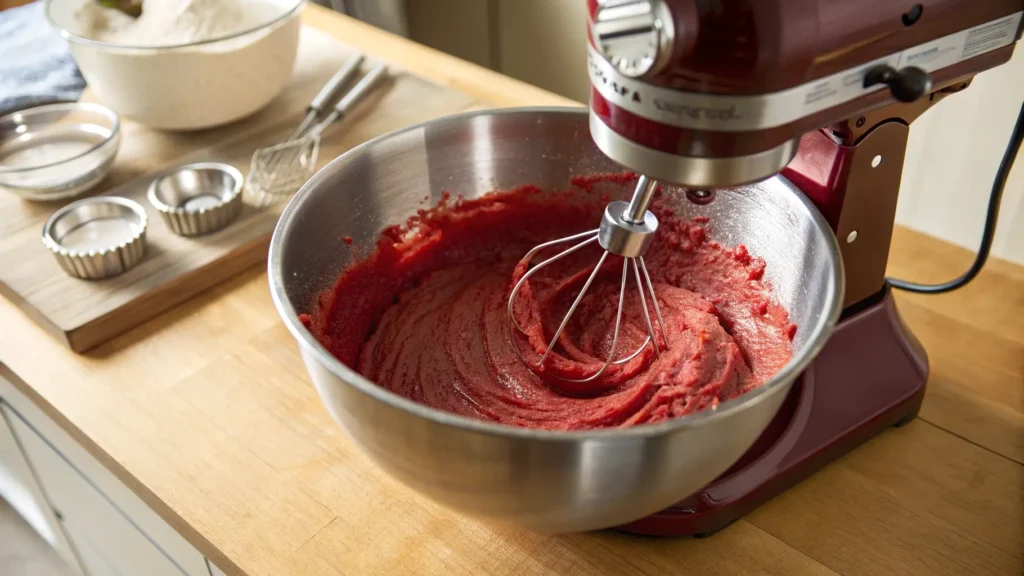
Step 4: Combine Wet and Dry Ingredients
Gradually add the dry ingredients to the wet mixture, mixing on low speed. Stop as soon as the batter is smooth to avoid overmixing, which can make the cake dense. Your batter should be velvety and evenly red.
Step 5: Bake the Cake
Divide the batter evenly between the two prepared cake pans. Smooth the tops with a spatula. Bake for 25–30 minutes, until a toothpick poked in the center comes out clean. Let the cakes rest in their pans for 10 minutes, then transfer them to a cooling rack.
Step 6: Make the Cream Cheese Frosting
In a large bowl, beat the cream cheese and butter until smooth, about 2 minutes. Gradually blend in the powdered sugar, one cup at a time, on low speed to avoid a powdery cloud. Add the vanilla extract and beat until creamy. If the frosting is too thick, add a tablespoon of milk.
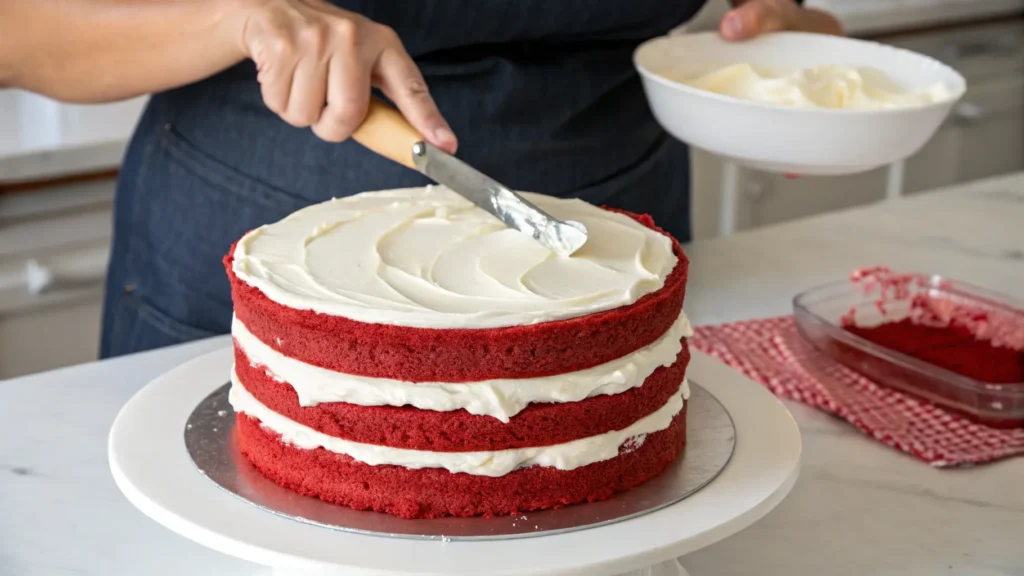
Step 7: Assemble the Cake
When the cakes are fully cooled, trim the tops with a knife if they’re uneven. Place one cake layer on a cake stand and spread a thick layer of frosting on top. Place the second cake layer on top and spread frosting over the top and sides. For a professional look, use a spatula to smooth the frosting or create swirls.
Tips for a Perfect Red Velvet Cake
Want to know how to make your red velvet cake stand out? Here are some expert tips:
- Use Room Temperature Ingredients: Allow ingredients to sit at room temperature for 30 minutes before you begin. Cold eggs or butter can lead to a lumpy batter.
- Don’t Overmix: Mixing too much activates gluten, making the cake tough. Stop when the batter is just combined.
- Verify Oven Heat: A too-hot oven can make the cake dry. Use an oven thermometer for accuracy.
- Use Gel Food Coloring: It provides a vibrant red without altering the batter’s consistency, unlike liquid coloring.
- Cool Completely Before Frosting: Warm cakes melt the frosting, so be patient.
These tips, inspired by Sally’s Baking Addiction, ensure a moist, fluffy cake every time.
Common Mistakes to Avoid
Even experienced bakers make mistakes. Here’s how to avoid them:
- Using Too Much Cocoa: Red velvet cake isn’t chocolate cake. Stick to 2 tablespoons of cocoa powder for the right flavor balance.
- Skipping the Vinegar: It reacts with baking soda to create lift, so don’t omit it.
- Overbaking: Check the cake at 25 minutes. Overbaking leads to a dry texture.
- Not Measuring Accurately: Use measuring cups for dry ingredients and a liquid measuring cup for buttermilk to ensure precision.
Variations on the Classic Recipe
Red velvet cake is versatile. Try these variations to suit different diets or preferences:
- Gluten-Free: Swap all-purpose flour for a 1:1 gluten-free flour blend. Check that your baking soda is gluten-free. If you’re avoiding gluten, you can adapt this recipe or try our gluten-free chocolate cake for a similar dessert experience.
- Vegan: Use plant-based milk with 1 tablespoon of vinegar for buttermilk, and replace eggs with flaxseed eggs (1 tbsp flaxseed + 3 tbsp water per egg).
- Cupcakes: Pour the batter into a lined muffin tin and bake for 18–20 minutes. This yields about 24 cupcakes.
- Natural Coloring: Use beet powder instead of red food coloring for a natural hue, though the color may be subtler.
These variations, noted in Preppy Kitchen, make the recipe accessible to more people. For another beginner-friendly dessert, try our vanilla cake recipe, which shares similar ingredients like flour and sugar.
How to Store and Serve Red Velvet Cake
After baking, proper storage keeps your cake fresh. Here’s how:
- Room Temperature: Store unfrosted cakes in a sealed container for up to 2 days.
- Refrigerator: Frosted cakes need refrigeration due to cream cheese frosting. Keep the cake in a sealed container for up to five days to maintain freshness.
- Freezer: Tightly wrap unfrosted cake layers in plastic and freeze for up to 3 months. Thaw overnight in the fridge before frosting.
Present the cake at room temperature for optimal taste and texture. Pair it with coffee or tea for a delightful treat.
Red Velvet Cake vs. Chocolate Cake: What’s the Difference?
Curious about what sets red velvet cake apart from chocolate cake? While both use cocoa powder, red velvet has a much smaller amount (2 tablespoons vs. ½ cup or more in chocolate cake). The buttermilk and vinegar in red velvet add a tangy flavor, and the red food coloring gives it a unique look. Chocolate cake, on the other hand, has a deeper, richer chocolate flavor. To explore a richer chocolate dessert, check out our chocolate cake recipe, which uses more cocoa powder for a deeper flavor.
FAQs About Red Velvet Cake
Here are answers to common questions about making red velvet cake:
- What makes red velvet cake red? The color comes from red food coloring or, historically, a reaction between cocoa and acidic ingredients like buttermilk. Gel food coloring is most effective today.
- Can I make red velvet cake without food coloring? Yes, use beet powder for a natural reddish hue, or skip it for a brownish cake that still tastes great.
- How do I keep my cake moist? Use oil in the batter, don’t overbake, and store properly to retain moisture.
- Can I freeze red velvet cake? Yes, wrap unfrosted layers tightly and freeze for up to 3 months. Frost after thawing.
The History of Red Velvet Cake
Red velvet cake has a rich history. It emerged in the United States during the early 20th century, with early versions using beet juice for color during ingredient shortages. The Waldorf-Astoria Hotel in New York popularized it in the mid-20th century, and its Southern roots made it a staple for celebrations. Today, it’s a global favorite, loved for its striking appearance and unique flavor.
Why You’ll Love This Recipe
This recipe is easy for beginners, uses basic ingredients, and produces a moist, tasty cake. The cream cheese frosting provides a zesty balance, making every bite delicious. Plus, with tips and variations, you can customize it to your needs.
Conclusion: Bake Your Own Red Velvet Masterpiece
Red velvet cake is more than a dessert—it’s a celebration of flavor and tradition. With this easy recipe, you can create a moist, vibrant cake that impresses every time. Whether it’s for a birthday, holiday, or just because, this classic red velvet cake will delight your guests. Try this recipe today and share your results in the comments below!

Red Velvet Cake Recipe
Ingredients
- 2 ½ cups all-purpose flour
- 2 tablespoons unsweetened cocoa powder
- 1 teaspoon baking soda
- ½ teaspoon salt
- 1 ½ cups granulated sugar
- ½ cup unsalted butter room temperature
- ½ cup vegetable oil
- 2 large eggs room temperature
- 1 cup buttermilk room temperature
- 2 tablespoons red gel food coloring
- 1 teaspoon vanilla extract
- 1 teaspoon white vinegar
- 16 oz cream cheese room temperature, for frosting
- ½ cup unsalted butter room temperature, for frosting
- 4 cups powdered sugar for frosting
- 1 teaspoon vanilla extract for frosting
Instructions
- Preheat oven to 350°F (175°C). Grease two 9-inch round cake pans and line with parchment paper.
- In a medium bowl, sift flour, cocoa powder, baking soda, and salt to create a lump-free batter. Set aside.
- In a large bowl, use a stand mixer to cream butter and sugar until light and fluffy, about 2–3 minutes.
- Add vegetable oil and mix well. Add eggs one at a time, mixing thoroughly after each.
- Pour in buttermilk, red gel food coloring, vanilla extract, and white vinegar. Mix until evenly colored.
- Gradually add dry ingredients to wet mixture, mixing on low speed until just combined.
- Divide batter evenly between prepared pans. Smooth tops with a spatula.
- Bake for 25–30 minutes, until a toothpick poked in the center comes out clean.
- Let cakes rest in pans for 10 minutes, then transfer to a cooling rack to cool completely.
- For frosting, beat cream cheese and butter until smooth, about 2 minutes.
- Gradually blend in powdered sugar, one cup at a time, on low speed. Add vanilla extract and beat until creamy.
- Trim cake tops if uneven. Place one layer on a cake stand, spread frosting on top, then add the second layer.
- Spread frosting over the top and sides. Smooth with a spatula or create swirls for decoration.
Notes
- Use room temperature ingredients for a smoother batter.
- Avoid overmixing to keep the cake fluffy and moist.
- Use gel food coloring for a vibrant red hue without excess liquid.
- No buttermilk? Mix 1 cup milk with 1 tbsp lemon juice or vinegar and let sit for 5 minutes.
- Gluten-Free Variation: Swap all-purpose flour for a 1:1 gluten-free flour blend.
- Vegan Variation: Use plant-based milk with 1 tbsp vinegar for buttermilk and flaxseed eggs (1 tbsp flaxseed + 3 tbsp water per egg).
- Cupcakes: Pour batter into a lined muffin tin and bake for 18–20 minutes (yields 24 cupcakes).
- Calories: 520 kcal
- Fat: 28 g
- Saturated Fat: 15 g
- Cholesterol: 85 mg
- Sodium: 300 mg
- Carbohydrates: 65 g
- Fiber: 1 g
- Sugar: 50 g
- Protein: 6 g
- Calories: 520 kcal (sugar, butter, frosting)
- Fat: 28 g (15 g saturated from butter, cream cheese)
- Cholesterol: 85 mg (eggs, cream cheese)
- Sodium: 300 mg (baking soda, salt)
- Carbs: 65 g (50 g sugar from granulated/powdered sugar)
- Fiber: 1 g (minimal from flour, cocoa)
- Protein: 6 g (eggs, cream cheese)